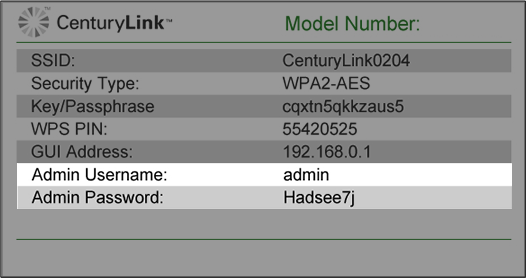
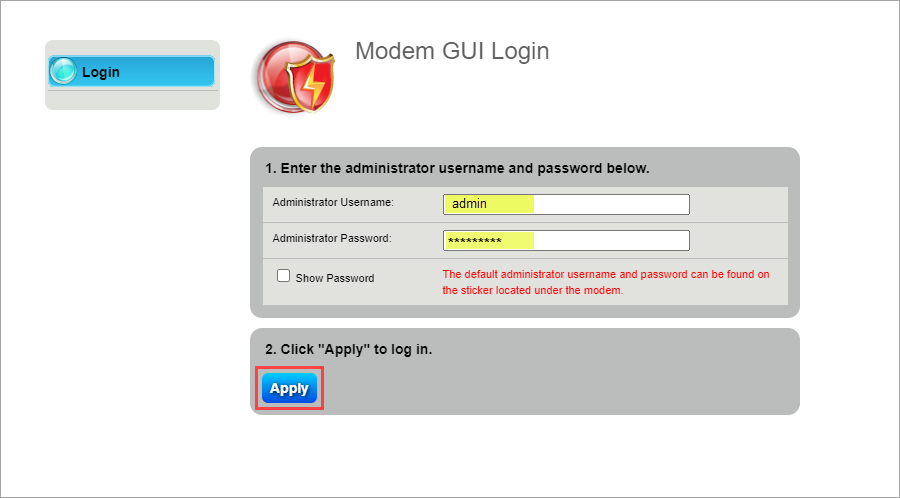
You can find the Admin Username and Password printed on the sticker attached to the side, back or bottom of the modem.
CAUTION!Do not remove your modem sticker. It includes your default Admin Username and Admin Password, which cannot be retrieved if lost. Your modem could become unusable without them.
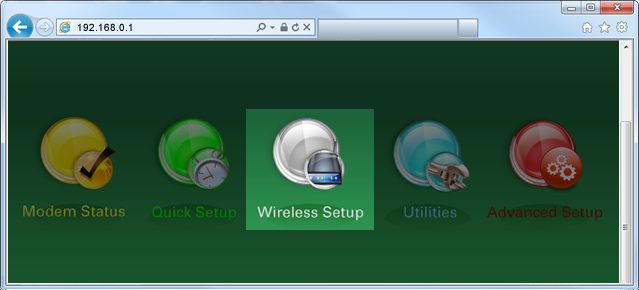
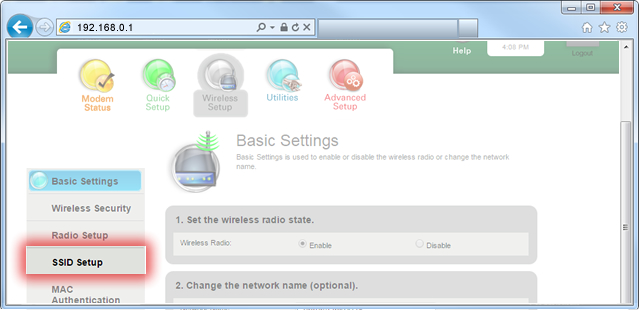
4. Select Wireless Setup in the main menu.
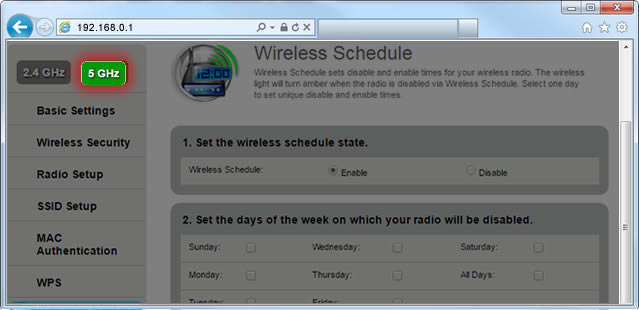
5. If given the choice, select a frequency (2.4 or 5 GHz) in the left sidebar. Some models do not offer this option. Read more about the how to choose between 2.4 and 5 GHz frequency, and learn which modems have this capability.
6. Select SSID Setup from the menu on the left sidebar.
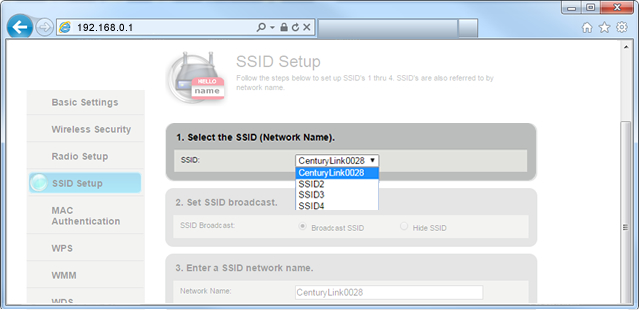
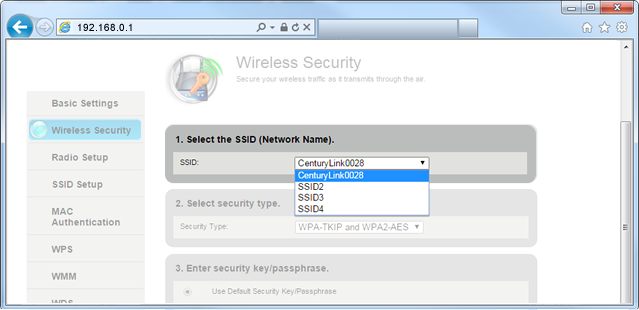
7. Your primary network should appear at the top of the SSID dropdown list. Choose SSID2 to set up a second network.
You can repeat this process with SSID3 and SSID4, if needed.
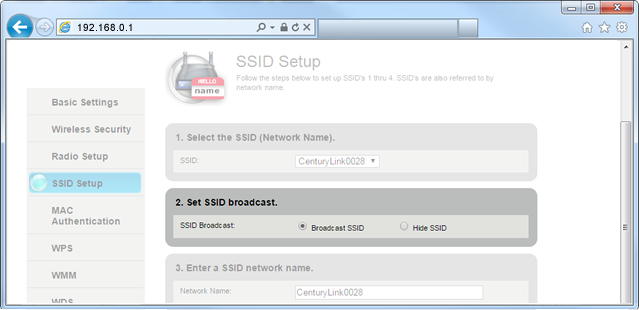
8. Select Enable SSID to activate the network. For some models you may see an option to "Broadcast" the network, which allows the network to be seen by users within range.
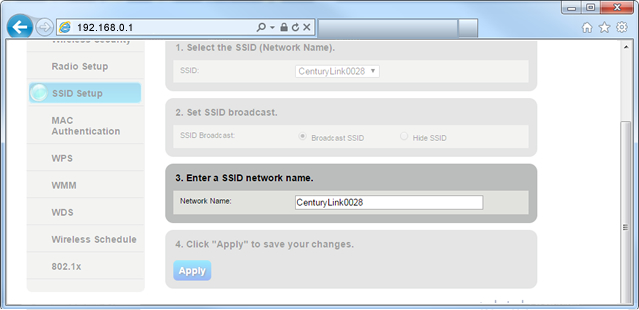
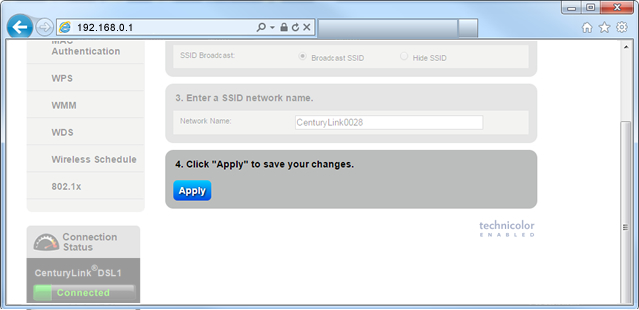
9. Enter a name for your public network. We recommend including "public" or "guest" to make it easy for your customers to find.
10. Select Apply to save your changes. The second network has now been created and enabled.
Part two: Security settings
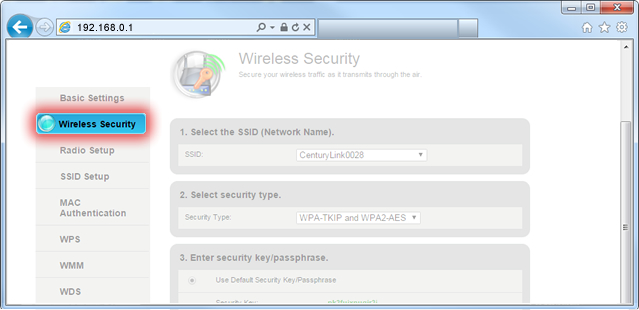
11. Next you will need to change some of the security settings. Choose Wireless Security in the left sidebar.
12. Select the name of the new SSID that you just created.
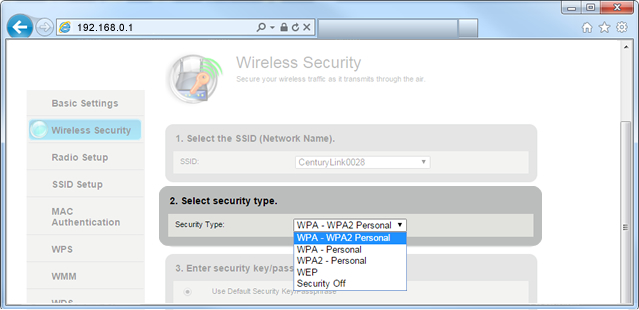
13. Select the security type. We recommend you choose WPA2 for the strongest security.
14. Create a password that will be easy to remember and to share with customers.
15. Select Apply to save your changes again. Now your new network should be live.
You might want to test the network by connecting a device to it.